
Introduction
A smart blender is one of the most versatile and frequently used appliances in a modern kitchen. If you have a compact kitchen, choosing the right appliances is crucial. Check out our guide on 5 Best Space-Saving Smart Kitchen Gadgets for Small Apartments to maximize your counter space. From refreshing morning smoothies and hot soups to custom sauces, it handles it all with a single touch. However, because of its powerful motor and sharp blades, food residue can easily get trapped in hard-to-reach places.
If not cleaned properly, this can lead to bacterial growth and eventually damage the motor. To keep your smart blender running at peak performance and ensure it lasts for years, follow this simple, step-by-step cleaning and maintenance guide.
The 60-Second Self-Cleaning Trick (After Every Use)
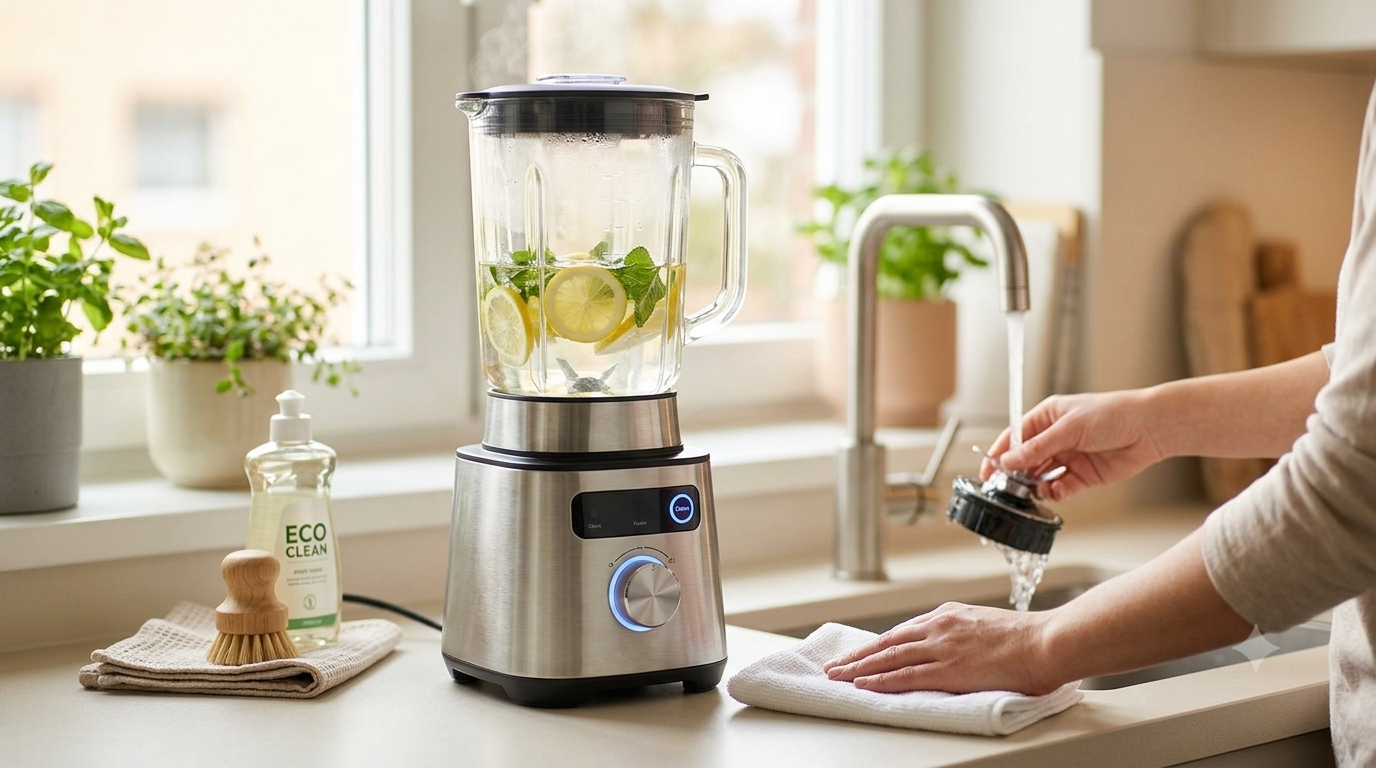
The easiest way to clean your blender is to let it clean itself right after you finish blending. Do not let the leftovers dry up!
- Rinse Immediately: Pour out your smoothie or sauce and give the jar a quick rinse with warm water.
- Add Soap and Water: Fill the blender jar halfway with warm water and add just 2–3 drops of liquid dish soap.
- Run the Clean Cycle: Secure the lid and select the “Pulse” or “Clean” preset on your smart blender. Run it for about 30 to 60 seconds.
- Rinse and Dry: Pour out the soapy water, rinse thoroughly with clean water, and let it air dry upside down.
How to Deep Clean a Cloudy Blender Jar
Over time, minerals from hard water and film from fruits or vegetables can make your plastic or glass jar look cloudy. Here is how to restore its shine:
- The Vinegar Solution: Fill the jar with equal parts of warm water and white vinegar.
- Let it Soak: Allow the mixture to sit in the jar for at least 30 minutes to break down the mineral buildup.
- Scrub Gently: Use a non-scratch sponge to wipe down the interior walls.
- Wash and Dry: Rinse well and dry with a clean microfiber cloth.
Cleaning the Hard-to-Reach Parts
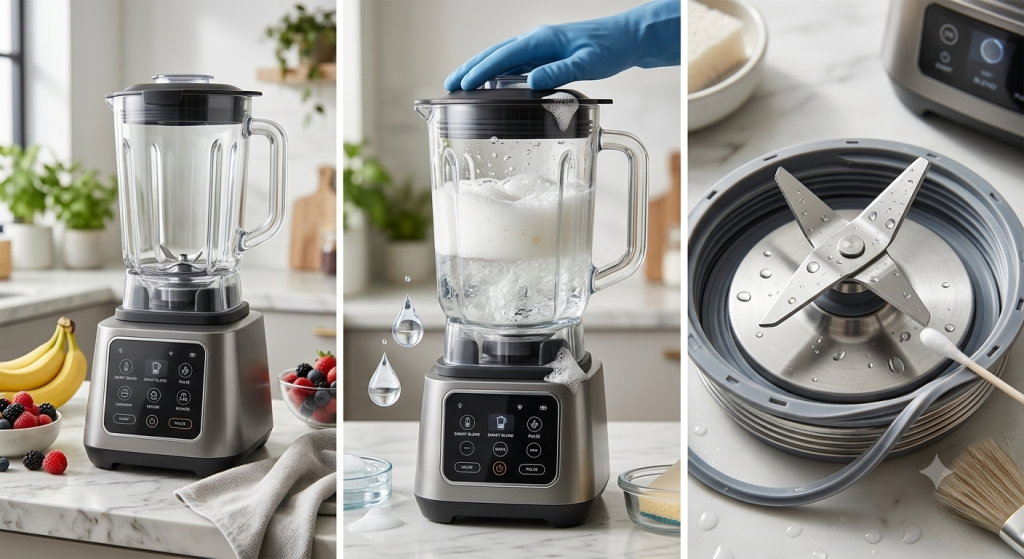
1. The Blades and Gasket (Rubber Ring)
If your blender model has a removable blade assembly, unscrew it once a week. Food particles love to hide underneath the rubber gasket. Wash the gasket and blade carefully with a dish brush, dry them completely, and reassemble.
2. The Smart Base and Control Panel
⚠️ Crucial Safety Note: Never submerge the blender base in water! It contains the motor and electronic components.
To clean the base, unplug the machine first. Use a damp microfiber cloth to wipe down the touchscreen panel and the exterior housing. If there is spilled liquid inside the gear area, use a cotton swab (Q-tip) dipped in warm water to gently clean it out.
Pro Maintenance Tips to Extend Your Blender’s Lifespan
- Layer Your Ingredients Correctly: Always put liquids in first, followed by powders, soft foods, and finally ice or frozen ingredients on top. This prevents the blades from getting jammed and reduces strain on the motor.
- Don’t Overload: Keep an eye on the maximum fill line. Overloading causes the motor to overheat.
- Avoid Harsh Abrasives: Never use steel wool or highly abrasive sponges, as they will scratch the jar and damage the smart sensors.
Conclusion
Taking care of your smart blender doesn’t require hours of work—just a bit of consistency. By practicing the quick self-cleaning routine after each use and giving it a deep clean once a month, you will keep your appliance smelling fresh, looking crystal clear, and performing like brand new for years to come.