
Why Is My Coffee Maker Brewing Slowly? 7 Causes & Easy Fixes


Why is my coffee maker brewing slowly? The most common reasons are mineral scale buildup, a clogged water path, a dirty filter basket, overly fine coffee grounds, or too much coffee in the filter. If your coffee maker used to brew normally but has gradually become slower, start by cleaning the filter basket and checking for scale buildup. If cleaning doesn’t restore normal water flow, follow your manufacturer’s descaling instructions before considering a mechanical problem.
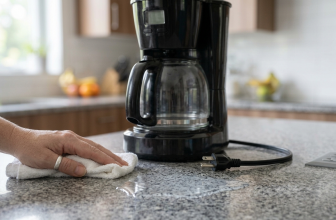
Safety first: Unplug the coffee maker and allow it to cool before cleaning or inspecting it. Never open the electrical housing or attempt to repair internal wiring yourself.
Why Is My Coffee Maker Brewing Slowly?
Every drip coffee maker moves water through the same basic path: from the water reservoir, through an internal heating system, along a water pathway, and finally through the filter basket and coffee grounds into your carafe or mug. A restriction anywhere along that path—mineral deposits, trapped coffee residue, an overfilled filter, or a blocked valve—can slow the whole cycle down, even if only one part of the system is actually affected.
This is why the same symptom (slow brewing) can have several different underlying causes and why the fix that works for one person’s machine won’t always work for another’s.
Is Slow Brewing Normal?
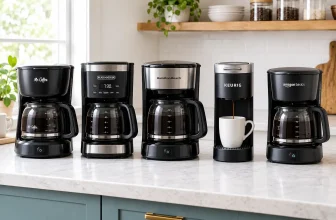
There’s no single universal brewing time that applies to every coffee maker. A drip machine, a single-serve pod machine, and an espresso machine all have very different cycle times by design, even at their normal, healthy speed.
The better question isn’t, “Should this take X minutes?” but rather, “Has your machine’s brewing time noticeably increased compared to how it normally performs?” If today’s brew is taking substantially longer than it usually does, that’s the signal to start troubleshooting, not a fixed number of minutes.
7 Common Causes of Slow Brewing & How to Fix Them
1. Mineral Scale Buildup (The Most Common Culprit)
This is usually the single most common cause of a slow coffee maker, especially in areas with hard water. Mineral deposits (limescale) gradually accumulate inside the heating element and water tubes, narrowing the path water flows through and reducing overall pressure.
- Signs: Your machine used to brew a full pot quickly but has gradually gotten slower over weeks or months; water flow seems visibly reduced; you can see white or chalky scale deposits inside the reservoir or around the water outlet.
- Fix: Descale the machine following your manufacturer’s specific instructions.

2. Clogged Internal Water Path
Coffee grounds or mineral deposits that work their way into the internal water pathway can physically restrict flow, independent of scale buildup on the heating element itself.
- Fix: Unplug the machine and let it cool. Empty the water reservoir, clean all accessible parts, and follow your manufacturer’s recommended cleaning cycle for the internal water path.
🛒 Recommended Products to Fix & Prevent Slow Brewing
Disclosure: SmartKitchenVibe is a participant in the Amazon Services LLC Associates Program. If you buy through links on our site, we may earn an affiliate commission at no extra cost to you.
Before buying a brand-new coffee maker, using the right maintenance accessories can often restore your machine’s original brewing speed in under 30 minutes:
| Product Type | Top Recommended Product | Why You Need It |
| Universal Descaler | Impresa Coffee Maker Descaling Solution | Safe, odorless liquid that breaks down mineral scale much faster and safer than vinegar. |
| Reusable Filter | Gold-Tone Stainless Steel Reusable Coffee Filter | Prevents paper filter clogging and allows optimal water flow during brewing. |
| Cleaning Brushes | Kitchen Appliance Micro-Cleaning Brush Set | Perfect for scrubbing tiny water outlets and narrow carafe valves. |
3. Dirty or Clogged Filter Basket
Old coffee oils and fine residue can build up in the filter basket or its bottom drip valve over time, physically restricting how quickly coffee can drain into the carafe.
- Fix: Wash the filter basket thoroughly with warm water and mild dish soap after every few uses. Ensure the spring-loaded stopper at the bottom moves freely.

4. Coffee Grounds Are Too Fine
This isn’t a machine hardware failure—it’s a coffee preparation issue. Grounds that are ground too fine (like espresso grind) pack together densely when saturated with hot water, acting as a barrier and slowing down water drainage.
- Fix: Use a medium grind size (similar to rough sea salt) recommended for standard drip coffee makers.
5. Overfilling the Filter Basket
An overfilled filter basket gives water less room to pass evenly through the coffee bed. This causes water to pool at the top, slowing down brewing, risking overflow, and leading to bitter, over-extracted coffee.
- Fix: Follow the 1:16 coffee-to-water ratio rule. Measure your coffee accurately using a scoop rather than guessing, and never fill past the basket’s maximum line.
6. Water Reservoir or Valve Misalignment
If the removable water reservoir isn’t seated properly, or there’s an issue with its bottom release valve, water cannot flow smoothly to the internal boiler.
- Fix: Remove the water reservoir, clean around the base valve, and push it firmly back into place until it clicks or locks securely.
7. Heating Element or Internal Pump Failure
If you’ve descaled, cleaned, checked your coffee grind, and confirmed the reservoir is properly seated—yet your machine still brews at a crawl—the internal heating coil or pump may be degrading.
- Fix: This is not a DIY electrical repair. At this stage, contact the manufacturer’s warranty support or consider replacing the unit if it’s out of warranty.
How to Fix a Coffee Maker That Is Brewing Slowly: Step-by-Step
If you are wondering why is my coffee maker brewing slowly, following these step-by-step cleaning instructions will solve the problem in most cases.
- Unplug and cool the machine before touching any internal parts.
- Clean the filter basket, removing coffee oils and fine sediment.
- Inspect the water reservoir — confirm it’s properly seated and that the outlet valve isn’t blocked.
- Check your coffee grounds — ensure you aren’t using an overly fine espresso grind.
- Measure your coffee — make sure you aren’t overfilling the filter.
- Descale the machine, strictly following your manufacturer’s guidance (note: some brands discourage pure vinegar, as it can degrade rubber gaskets).
- Run a fresh-water rinse cycle (2 full pots of clean water) after descaling to remove any residual solution.
- Test again with fresh water to verify that normal flow speed has returned.

Troubleshooting Quick-Reference Table
| What You Notice | Likely Cause | Primary Action |
| Brewing gradually became slower over weeks | Mineral scale buildup | Descale with a commercial solution |
| Water drips very slowly into the carafe | Blocked filter basket valve | Deep clean basket and spring stopper |
| The filter basket overflows with water | Too much coffee / Fine grind | Switch to medium grind & reduce coffee |
| The machine makes loud boiling/steaming noises | Blocked internal pipes | Run a thorough descaling cycle |
| The machine stays slow even after descaling | Internal heating element failure | Contact manufacturer / Replace unit |
| Water stays in the reservoir | Misaligned reservoir valve | Reseat reservoir properly |
How Long Should a Coffee Maker Take to Brew?
Brewing time varies by machine type, capacity, and heating wattage:
- Standard Drip Coffee Maker (10–12 Cups): 8 to 10 minutes
- Single-Serve Pod Machine (e.g., Keurig): 1 to 2 minutes
- 4–6 Cup Drip Machine: 5 to 6 minutes
The ultimate benchmark isn’t a strict clock time but your machine’s baseline performance. If your 10-cup machine used to take 8 minutes and now takes 18 minutes, action is required.
When Should You Stop Using the Coffee Maker Immediately?
🚨 Unplug your appliance immediately if you encounter:
- A sharp burning or electrical smell
- Visible smoke or sparks
- A frayed or hot power cord
- Water leaking near the electrical plug or bottom housing
- Loud, abnormal buzzing or electrical clicking
If any of these electrical warning signs occur, do not attempt a DIY fix.
How to Prevent Slow Brewing in the Future
- Clean daily: Rinse the filter basket and carafe after every use.
- Descale regularly: Descale every 1 to 3 months depending on local water hardness.
- Use filtered water: Using filtered or bottled water drastically reduces mineral deposits.
- Choose the right grind: Always stick to medium-ground coffee for drip appliances.
- Never leave wet grounds in the basket: Remove used grounds immediately after brewing to prevent mold and oil buildup.
Expert Tip: A Quick Diagnosis Shortcut
Pro Tip: If your coffee maker gradually slowed down over a few months, suspect mineral scale first. If it suddenly slowed down overnight from one brew to the next, check for a clogged filter, bad grind size, or misaligned reservoir valve.
Frequently Asked Questions
Why is my coffee maker brewing slowly?
The most common causes are mineral scale buildup, a clogged water path, a dirty filter basket, coffee grounds that are too fine, or too much coffee in the filter. Work through the 7 causes above in order, starting with the filter basket and scale buildup. The main reason why is my coffee maker brewing slowly is mineral scale buildup inside the water tubes.
How do I make my coffee maker brew faster?
Clean the filter basket, descale the machine according to your manufacturer’s instructions, use the recommended grind size, and avoid overfilling the filter. Together, these resolve slow brewing in the vast majority of cases.
Can mineral buildup make a coffee maker slow?
Yes, this is usually the single most common cause, especially in hard water areas. Scale deposits narrow the internal water pathway and reduce flow to the heating element.
Does a fine coffee grind slow down brewing?
Yes. Grounds that are too fine for your specific machine pack more densely in the filter, restricting water flow through the coffee bed and slowing the overall brew cycle.
Can too much coffee in the filter cause slow brewing?
Yes — an overfilled filter basket reduces the space water has to move through the coffee bed evenly, which can slow brewing and sometimes cause overflow.
How often should I descale my coffee maker?
This depends on your specific model and your local water hardness — always follow your manufacturer’s recommended descaling schedule rather than a generic timeline, since this varies significantly between machines and regions.
Why is my coffee maker taking longer than it used to?
A gradual slowdown over time usually points to mineral scale buildup. A sudden change from one brew to the next more often points to a blockage, incorrect coffee amount, or grind size issue.
Should I replace my coffee maker if it brews slowly?
Not necessarily. Start with cleaning, descaling, and checking your grind and coffee amount — these resolve most cases. Replacement is usually only worth considering if the machine continues to malfunction after thorough cleaning and maintenance.
Conclusion
A coffee maker that suddenly brews slowly doesn’t necessarily need replacement. Start with the simplest causes — clean the filter basket, check the coffee grind and amount, inspect the water path, and follow the manufacturer’s descaling instructions. If normal water flow doesn’t return after proper maintenance, the problem may require professional service rather than further at-home troubleshooting.
Understanding why your coffee maker is brewing slowly helps you fix the issue before considering buying a replacement machine.
Related reads: How to Descale a Coffee Maker Properly
Recommended Coffee Maker Guides:
- Coffee Maker Not Brewing Hot Enough? 7 Causes & Easy Fixes
- Why Is My Coffee Maker Leaking Water? 7 Causes & Easy Fixes
- How to Descale a Coffee Maker Properly: Complete Step-by-Step Guide
Recommended Products:
| Product Type | Top Recommended Product | Why You Need It |
|---|---|---|
| Universal Descaler | Tupkee Descaler Solution (2-Pack) | Safe, odorless liquid that breaks down mineral scale much faster and safer than vinegar |
| Reusable Filter | GOLDTONE Reusable 8-12 Cup Basket Coffee Filter | Prevents paper filter clogging and allows optimal water flow during brewing |
| Cleaning Brushes | XANGNIER Cleaning Brush Kit | Perfect for scrubbing tiny water outlets and narrow carafe valves |
Editorial Note
Reviewed by the Smart Kitchen Vibe Editorial Team
Smart Kitchen Vibe publishes practical kitchen appliance guides based on manufacturer documentation, product manuals, and real-world troubleshooting research. Every guide is reviewed to ensure it is accurate, easy to understand, and focused on helping readers solve appliance problems safely.




[…] Complete Step-by-Step GuideWhy Is My Coffee Maker Not Turning On? 7 Causes & Easy FixesWhy Is My Coffee Maker Brewing Slowly? 7 Causes & Easy FixesWhy Is My Coffee Maker Leaking Water? 7 Causes & Easy […]
[…] Why Is My Coffee Maker Brewing Slowly? 7 Causes & Easy FixesCoffee Maker Not Brewing Hot Enough? 7 Causes & Easy FixesWhy Is My Coffee Maker Not Turning On? 7 Causes & Easy Fixes […]